The ACT! Scheduler
The ACT! Scheduler – Scheduled Sync
ACT! has included a handy little application called the ACT! Scheduler for quite a while now. It gets installed automatically and is rarely used. Up until the most recent versions, TrilogyCRM has not recommended using the ACT! Scheduler for your synchronization tasks. Mainly because the scheduler did not notify the user of a failed sync. We would have angry customers because they were assuming that the syncs were running every hour – when in fact the database had not synchronized for weeks.
The newest versions have the ability to setup email alerts. Woot Woot! Follow the steps below to setup the scheduler. If you will be setting up the email alerts – you will need to complete the email alerts FIRST.
Setting Up Email Alerts
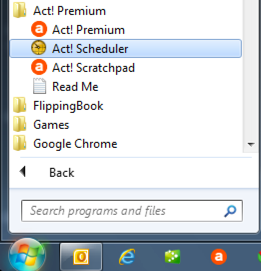
- Click on Start button and find the ACT! Scheduler (located under the ACT!)

- This will launch the Scheduler Settings Dialogue box. Click Set Up E-Mail Alerts.

- Your settings may vary but if you have a Gmail account (which I think everyone does at this point) the settings for Gmail are listed below. If you have your own SMTP server you can enter your information. Check with your Email Administrator for the settings. This is not something that TrilogyCRM can support or assist with as we do not host your Email. Once you enter the information you can click the Test Connection button and verify the settings are correct.

Setting up the ACT! Scheduler – Scheduled Sync
- Click on Start and find the ACT! Scheduler from the start menu. (Located under the ACT! Section)
- Click on Create A Task
- The next step is the most tricky for end users. This step is asking you “Where is the database you would like to use to setup the scheduled task?”. If you are a TrilogyCRM Hosting customer and followed the documentation – your database is located in the C:\ACTDATA folder. Click the Browse button on the screen and “find” your database (PAD) file, highlight it and click OPEN.

- Now – this is the really tricky step. You have to enter your username and password. This is your username and password that you use to access ACT! Don’t say it… Yes you do have a username. Everyone who uses ACT! has a username. You may not have a password but the username is usually your First Name and your Last Name. (i.e. Chris Huffman) If you don’t know this information, you will need to check with your administrator for assistance. Once you have updated your username – click NEXT.

- This window will allow you to select the type of Task to schedule. For this Quick Tip we are scheduling a Database Synchronization (remote database only) – select this option from the drop down and click NEXT.

- Set a Schedule – this window will allow you to setup the schedule on which the syncs will run. We’ll define the suggested settings – but feel free to adjust to match your working pattern. Select Hourly from the Occurs Column. We work a normal business day so Starting at 8:00AM and ending at 5:00PM is fine (adjust this to end just AFTER you normally end your day). Change the Every drop down to 1 hour. You can see when the task will run from the “Task will run at” indicator.Tweak your settings and click NEXT

- The final step is to set up the Send Notifications settings. In order to send notifications you are required to FIRST setup the Email Alert Settings (detailed above). If you did not setup the email settings – the Send e-mail notifications checkbox will be disabled. If you did setup your SMTP server correctly – you can check the checkbox and enter the email address that you would like to have the notifications sent to. Click the Send Teste E-Mail to ensure that your system is complete. Click Finish.

Congratulations! You have setup the ACT! Scheduler to automatically synchronize your database! Now get back to work and let the scheduler handle the sync’ing for you.