ACT! on the Surface Pro 3

Ya know how we know that the Microsoft Surface Pro 3 is a hot new device?  Because we get support calls about getting act! to work on it just about daily.  So we picked one up just to play a bit, and grab a few screen shots to help you Surface Pro 3 users get your act! together. (Insersurface-pro-3-300x205t cheesy comedy drums here a la buh dum dum.)

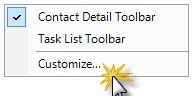
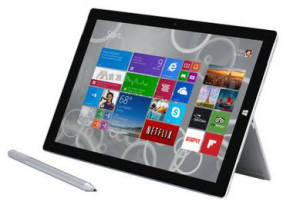
The Surface Pro 3 touts itself as the tablet that can replace your laptop.  Well, maybe.  It is fast, with it’s Windows 8.1.  That’s one thing to consider when setting up your act! on the device.  Can your version of act! run on Windows 8.1.  You do need act! 2013 or newer.  (Don’t have a version that new?  We’re happy to help with upgrades!)  Installing act! on the Surface Pro 3 isn’t so much the issue.  The calls we get are about the dialog boxes, field labels and anything else font related being, well. . . screwy.  Let’s look at why and how to work around that.

One thing is, the Surface Pro 3 has a pretty amazing display, capable of resolution you’d see on a 24″ or larger monitor.  The Surface Pro 3 comes out of the box with a default resolution of 2160 x 1440 pixels.  On the tablet-sized screen, this means the default font would be so tiny, no one over the age of 25 can see it.  To sort of work around that, Microsoft bumped the scaling in the Display Settings up to 150%.  That means in many programs, in our case, act!, things wrap all goofy, buttons are bumped off the screen, and dialog boxes are simply messed up.  Now, on to the work around. . .


Once you have act! installed on your Surface Pro 3, here are a few steps to improve your act! experience on your new Surface Pro 3:


1. Open a run prompt (Windows Key + R)
2. Type Control Panel
3. Click OK (or hit ENTER)
4. Click Displaysurface-4
5. Check the box “Let me choose one scaling level for all my displays”Surface-6-300x85
6. Change the scaling option to Smaller – 100%
7. Click Apply
8. Sign out and back in to Windows for the change to be applied


This takes care of the exaggerated font size, but now everything on your Surface is teeny!  We can fix that too.:

1. Right click anywhere on your Desktop
2. Choose Screen resolution
3. Change the resolution to 1600 x 900.
4. Click Apply

Take a look and see if that resolution works, if so choose “Keep Changes”.  If not, click Revert and try another, lower resolution.  The combination of these things should make your act! experience, and your eyes, far happier!

Not completely comfortable with all of this?  Give us a shout, we can certainly help.  Call us at (614) 221-0276  or e-mail support@trilogycrm.com.

The ACT! Scheduler

The ACT! Scheduler – Scheduled Sync

ACT! has included a handy little application called the ACT! Scheduler for quite a while now.  It gets installed automatically and is rarely used.  Up until the most recent versions, TrilogyCRM has not recommended using the ACT! Scheduler for your synchronization tasks.  Mainly because the scheduler did not notify the user of a failed sync.  We would have angry customers because they were assuming that the syncs were running every hour – when in fact the database had not synchronized for weeks.

The newest versions have the ability to setup email alerts. Woot Woot!  Follow the steps below to setup the scheduler.  If you will be setting up the email alerts – you will need to complete the email alerts FIRST.


Setting Up Email Alerts

  1. Click on Start button and find the ACT! Scheduler (located under the ACT!)
    Step1
  2. This will launch the Scheduler Settings Dialogue box.  Click Set Up E-Mail Alerts. Step2
  3. Your settings may vary but if you have a Gmail account (which I think everyone does at this point) the settings for Gmail are listed below.  If you have your own SMTP server you can enter your information.  Check with your Email Administrator for the settings.  This is not something that TrilogyCRM can support or assist with as we do not host your Email.   Once you enter the information you can click the Test Connection button and verify the settings are correct.
    SMTPSettingsForGMail

Setting up the ACT! Scheduler – Scheduled Sync


  1. Click on Start and find the ACT! Scheduler from the start menu. (Located under the ACT! Section)Step1
  2. Click on Create A Task
    Step2
  3. The next step is the most tricky for end users.  This step is asking you “Where is the database you would like to use to setup the scheduled task?”.  If you are a TrilogyCRM Hosting customer and followed the documentation – your database is located in the C:\ACTDATA folder.  Click the Browse button on the screen and “find” your database (PAD) file, highlight it and click OPEN.
    Step3
  4. Now – this is the really tricky step.  You have to enter your username and password.  This is your username and password that you use to access ACT!  Don’t say it… Yes you do have a username.  Everyone who uses ACT! has a username.  You may not have a password but the username is usually your First Name and your Last Name. (i.e. Chris Huffman)   If you don’t know this information, you will need to check with your administrator for assistance.  Once you have updated your username – click NEXT.
    Step4
  5. This window will allow you to select the type of Task to schedule.  For this Quick Tip we are scheduling a Database Synchronization (remote database only) – select this option from the drop down and click NEXT.
    Step5
  6. Set a Schedule – this window will allow you to setup the schedule on which the syncs will run.  We’ll define the suggested settings – but feel free to adjust to match your working pattern.  Select Hourly from the Occurs Column.  We work a normal business day so Starting at 8:00AM and ending at 5:00PM is fine (adjust this to end just AFTER you normally end your day).   Change the Every drop down to 1 hour.  You can see when the task will run from the “Task will run at” indicator.Tweak your settings and click NEXT
    Step6
  7. The final step is to set up the Send Notifications settings.  In order to send notifications you are required to FIRST setup the Email Alert Settings (detailed above).  If you did not setup the email settings – the Send e-mail notifications checkbox will be disabled.  If you did setup your SMTP server correctly – you can check the checkbox and enter the email address that you would like to have the notifications sent to.  Click the Send Teste E-Mail to ensure that your system is complete.   Click Finish.
    Step7

Congratulations! You have setup the ACT! Scheduler to automatically synchronize your database!  Now get back to work and let the scheduler handle the sync’ing for you.


ACT!V16 Service Pack 1

We’re announcing ACT!v16 Service Pack 1 (Hotfix 1) has been certified for TrilogyCRM hosting customers!  What does this mean for you?  We’ll if you are using ACT!v16 and hosting with TrilogyCRM – you will be required to run this update.

This Service Pack does contain a schema update.  That means:

  • Be sure you are an Act! Administrator.  You’ll be prompted to update the database when you open it after installing SP1.  Only Admins can update the database schema.
  • SP1 must be applied to the host & all remote databases to maintain synchronization
  • SP1 must be applied to the main database host and all network users to maintain connectivity via network share

Curious about what SP1 is all about?  Here are some FAQs – http://kb.swiftpage.com/app/answers/detail/a_id/37445

To apply Service Pack 1:

  1. Go to http://www.act.com/support/download-center/
  2. Click on the link for your version – Pro or Premium (If you aren’t sure of your version, open Act!.  Click Help, then About Act!.  Your version is listed there.)  All hosting customers are on the Premium version and should download ONLY the Premium files.ACTv16SP1UpdateDetail
  3. Download the SP1 Update specific to your version, saving it to a place you can easily find itACTv16SP1-Step2
  4. Browse to & double click the actprem16sp1_us_update.exe
  5. Click Run
  6. The install is unpacked
  7. Click Install

Install

Follow the prompts to install the Service Pack.   Once the service pack has been successfully installed – you can continue to download and install Hot Fix 1 (instructions below).


Applying Act! v16 SP1 HF1

To apply Hot Fix 1, download it from http://www.act.com/support/download-center/, following the same process as installing Service Pack 1.

  1. Download the ACT! Service Pack 1 Hotfix 1 file from the Download Center.ACTv16SP1HF1-Step1
  2. Run the Hotfix 1 file.
    ACTv16SP1HF1-Step2


ACTv16SP1-Step3

Now that you have upgraded to Service Pack 1 AND run the hot fix – it’s time to open your database and update the schema.   Open your database.  You SHOULD get a message indicating that the database needs to be upgraded and asking you if you want to backup your database.  It’s a good idea to backup your database but not completely necessary.  Since you are hosting – we have a way to recreate your database from the server should something happen. 

Click either yes or no and the database will upgrade to Service Pack 1 HF1.  Once the process completes you can check your version by going to Help – About ACT!.  You should see Act! Premium Version 16.1.207.0. Hot Fix 1
ACTv16SP1-Step4

If you run into any errors or issues installing the service pack our technical support team will be available to assist you.  Please initiate support by emailing support@TrilogyCRM.com and be as detailed as possible when explaining your issue.  Tech support is available for hosting customers who have attempted the installation and encounter errors.  If you prefer to have Tech Support process the update for you – additional billable support time will be incurred.


Registering ACT!

The first time that you launch ACT!, you will be asked to register ACT! and then activate the software.

Please use the following steps to register the program:

Launch ACT! and go to the Help menu then select Register ACT!.  The ACT! Premium Registration and Activation Wizard – Welcome dialog box appear

register-act-1

If you are using the trial version, enable the I want to try ACT! before registering option click Next and ACT! will launch. Otherwise, click I have purchased ACT! and I am ready to register and click Next. The following Enter a Serial Number dialog box appear Read more

Help! IE 9 installed and ACT! won’t work

For the last couple of weeks, about one out of every five e-mails we receive are ACT! Premium for Web issues caused by Internet Explorer 9.    Things like, “all of a sudden, I can’t get to my database”  or APFW users are getting the “cannot display the page” nasty-grams from Internet Explorer.  What a lot of users don’t understand is that Microsoft pushes updates to your machine, depending on your Windows Update settings, sometimes without you even realizing.  The best medicine here, per the old adage, is prevention.  One of our earlier posts touched on this also -http://famous-loaf.flywheelsites.com/2011/04/what-will-that-upgrade-impact/.  We try to ensure our customers are in the know, but you have things to do, businesses to run, sales to close, and we know computer things happen.  Read more

The ACT! Knowledgebase

O.K., so it’s 11:45 at night and you need to run this report to send to your boss for the 8:00 a.m. staff meeting, you run the report and get an error message. Now what? During normal business hours you can always reach out to support@TrilogyCRM.com, but that email may or may not be read at 11:45 at night. And, in this economy, why not take advantage of the free option? Anytime, 24/7, and always free, you can use the ACT! Knowledge Base.

Go to http://kb.sagesoftwareonline.com and click on the Search option. Then, pick your Product (choose “ACT! by Sage Family of Products”), and choose your ACT! version. In the “Search by Keyword” field, type in your error message or question.

The results can be all over the place, but if you have a specific error message your odds are good to get a direct hit. When searching based on general questions and how-to’s, like “how do I mail merge”, can be more difficult. With resourceful wording, and once you get the hang of searching, you can definitely find answers.

The ACT! Knowledge Base is the tool that we use when find ourselves with an error message that we haven’t seen before. The directions are well written and usually include pictures to help you along. So, next time you find yourself in an ACT! bind, remember you always have a free resource – the ACT! Knowledge Base.

QuickTip – Speeding up ACT!

One of the most common question we receive is, how can I speed up my ACT!?  Here is a QuickTip that should help squeeze a bit more horse power out of your ACT! software.  Check out this Knowledge Base article (or KB article to us cool kids) – http://bit.ly/i6738Q.

I just got my new Mac and I need to install ACT!

You opened the matte-finished, white apple box to see that beautiful aluminum laptop with the glassy glowing apple logo.  Congratulations, you have your first Mac.  Isn’t it pretty?  If you are coming from the world of Windows there is a quick learning curve, but it’s well worth the effort.  We get a lot of calls asking, “Now that I have my Mac setup, how do I get ACT! on it?”  Short answer is you can’t, well… sort of. Read more

Quick Tip – Add Sync Now Button To The Toolbar

The majority of our users are remote database users, or sync users. For those that don’t know, a sync user has ACT! installed on their computer, with a remote database and they synchronize changes to and from the main database. For any ACT! user, the fewer clicks to accomplish a task the better. Adding the sync and refresh buttons to the Toolbar eliminate clicking through menus completely, and give you single click access.

To add the buttons: Read more